
Thursday, December 2, 2010
Sign Unsigned Applications Using Sis Editor
Do you like this story?

No more certificate Error ...!!
This post gives you a step by step description about Adding your signature (.cer and .key file) and Signing unsigned Application using sis Editor v0.70 with the help of screen shots.
The things you must have is .cer and .key file based on your IMEI and sis Editor.
Download sis Editor v0.70 signed Full
Get your signing .cer and .key
If you allready have the Application and .cer and .key skip it.
Adding Your Signature( .cer and .key File) to the sis Editor signature list.
1. Place your .cer and .key file in your phone or MMC in any folder.
eg: E:\Others\myCertificate
2. Open SIS Editor
3. Go to Options--Signature--Certificate management
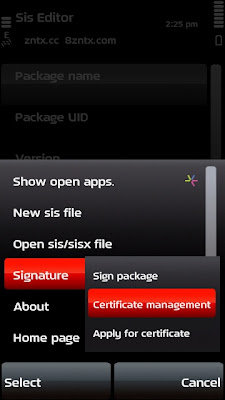
4. Now you will see a page Contains Two Signatures (1.Self Sign 2.BiNPDA)
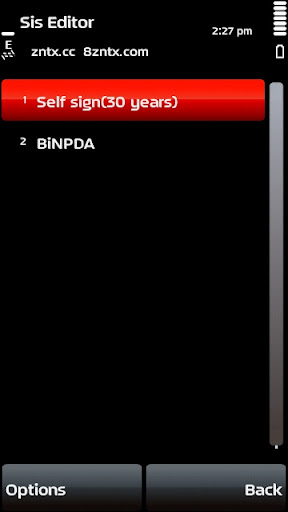
5. Go to Options--Add certificate

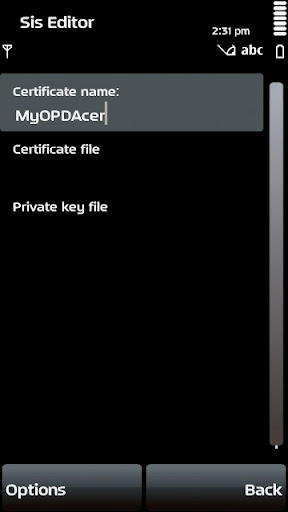
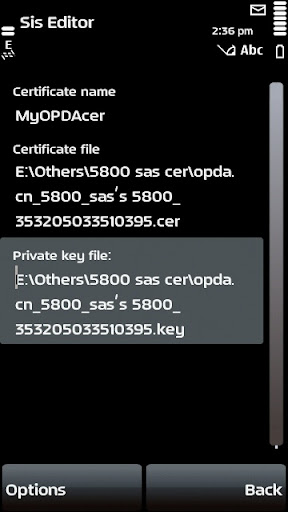
6. Now you will see a page with 3 menu (Certificate name , Certificate file , Private key file) Give any name to Certificate name:(eg: myOPDAcer)
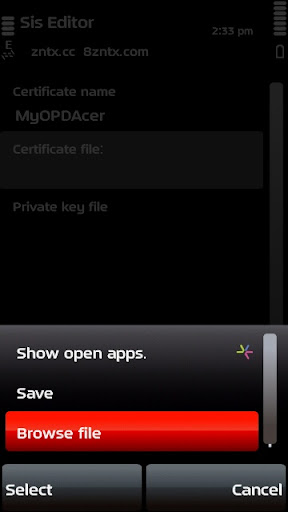
7. Now click on Certificate file:
Options--Browse file
(Browse and select the .cer file in your phone where you saved in your MMC or Phone)
then click on Private key file:
Options--Browse file
(Browse and select the .key file in your phone where you saved in your MMC or Phone)
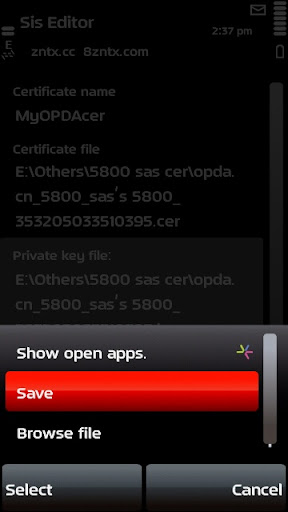
8. After selecting your .cer and .key file
Go to Options--Save
Done ...! Click Back
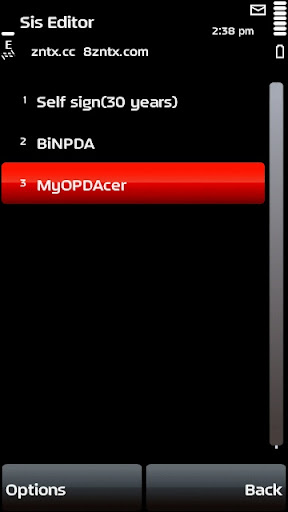
Now you will see 3 certificates include one which created by you.
Click Back--Exit
You need to do it only one time ,your added signature will remain in the list untill you delete or remove the sis editor.
Yes you did it you are success fully added your signature to the list.
Steps To Sign Your Unsigned Application Using Your Added Signature.
1. Open SIS Editor
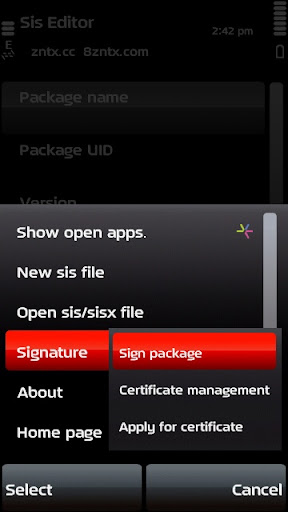
2. Go to Options--Signature--Sign package
3. Now it will give a page to browse the unsigned application that you want to sign
Browse and select it (eg: i am browsed Quick Office 6)
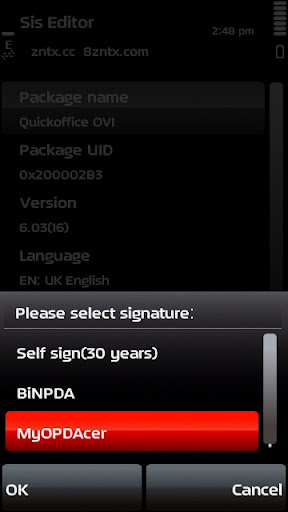
4. Now you will get "Please select signature:" page showing the three signatures include your created one.
Select your signature that you created I am selected MyOPDAcer as i am named it so.
5. Now go to Options--Save file
and Save anywhere you like

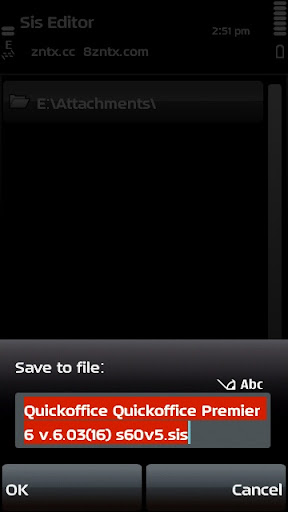
Done EXIT
Yes Now You successfully signed your unsigned Application. Please comment here if you face any error.

This post was written by: s@beer
Subscribe to:
Post Comments (Atom)


6 Responses to “Sign Unsigned Applications Using Sis Editor”
December 31, 2010 at 12:12 PM
great tutorial mate....thanks
July 2, 2011 at 10:08 AM
Where is the link to sis-editor
July 2, 2011 at 10:08 AM
Where is the link to sis-editor
July 2, 2011 at 10:10 AM
Where is the link to download sis-editor.... bothe the link directs to the same link
July 4, 2011 at 9:29 PM
Link Fixed...
April 28, 2013 at 12:48 AM
I cannot see save option Op Step No 5..? Help Please
!
Post a Comment